Maybe the speedometer’s stuck at 0 when you’re cruising down the highway, the fuel gauge flickers like a faulty lightbulb, or the entire cluster goes dark. A malfunctioning instrument cluster isn’t just annoying, it can even put your safety at risk. But don’t stress: the repair process is more straightforward than you might think. 
Step 1: Initial Diagnosis And Finding the Root Cause.
The first thing a technician will do is diagnose the problem, not just replace parts blindly.
1. OBD Scanner Check: They’ll plug in V519 scanner to your car’s port. This tool reads error codes stored in your car’s computer, which often point to specific issues, such as a faulty sensor sending bad data to the cluster, or a wiring problem.
2. Visual Inspection: they’ll check the cluster itself for water intrusion, burnt-out bulbs, or loose connections. They might also inspect the wiring harness for frays, corrosion, or loose plugs.
3. Functional Tests: To rule out intermittent issues, they may test the cluster while the car is on and off, or even take a short test drive to see if the problem reoccurs in real-world conditions.
Step 2: Component Inspection.
Once the diagnosis narrows things down, the technician will inspect key components related to the cluster:
1. Sensors: Many gauges rely on sensors. A faulty speed sensor, for instance, can make the speedometer stop working, even if the cluster itself is fine.
2. Bulbs or LEDs: For analog clusters with backlighting, burnt-out bulbs are a common fix. Digital clusters might have faulty LED strips causing dimness.
3. Cluster Circuit Board: Inside the cluster, there’s a circuit board. If it’s damaged, certain gauges or screens might fail. Technicians may use BSIDE A1X multimeter to test for electrical continuity here.
4. Wiring Harness: Corroded or loose wires are a frequent culprit. Even a tiny break in a wire can disrupt communication between the cluster and the car’s systems.
Step 3: Repair or Replacement to Fixing the Issue.
Depending on what’s wrong, the solution will be either a repair or replacement:
1. Bulb/LED Replacement: If only the backlighting is out, swapping in new bulbs or LEDs is quick and affordable.
2. Wiring Fixes: Corroded wires can be cleaned, and frayed ones can be spliced or replaced. Loose connections just need to be resecured.
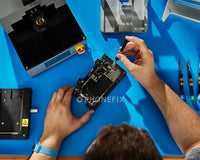
3. Circuit Board Repairs: For minor board damage, such as a loose solder joint, technicians can repair it with AE680 Soldering Iron, this is often cheaper than replacing the entire cluster.
If the cluster’s circuit board is severely damaged, digital screen is cracked or unresponsive , it is need to replacement, the technician will program the new cluster to match your car’s VIN so it works with your car’s systems.
Step 4: Post-Repair Testing.
Once the repair or replacement is done, the job isn’t over yet, testing is key to avoid repeat issues.
1. Static Test: With the car off, they’ll check if all gauges, lights, and screens power on correctly.
2. Idle Test: With the car running, they’ll verify that gauges respond properly at idle.
3. Test Drive: A short drive lets them confirm the speedometer, fuel gauge, and warning lights work as they should in motion.
4. Final OBD Check: They’ll check the error codes again to ensure no new issues popped up during the repair.
Automotive instrument cluster plays a vital role in your vehicle's operation, providing essential data that ensures safe driving. Ensuring that the cluster functions properly is key to maintaining your vehicle's health and your safety.
If you find that the dashboard is malfunctioning, don’t DIY Unless You’re Experienced, electrical work or cluster programming can damage your car if done wrong. Look for shops with experience working on your car’s make and model especially for modern digital clusters, which require specialized knowledge.


