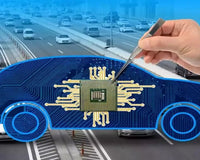
In the rare event where an IC chip within your car's ECU becomes damaged and needs replacement, the delicate operation of removing the old chip and soldering a new one is not just a task—it's a technical performance that requires precision and the right tools.
Performing a function test of the ECU is the first step to determine if the problem lies within the ICs. BDM100 ECU reader can help identify the problematic chip, but physical inspection may also reveal signs such as corrosion, damage to the casing, or even visible burn marks.

Once it is determined that the ECU ic is damaged, we can start to replace the chip.
Step 1: ECU Access and Preparation
1.Unfasten the ECU from the vehicle and locate the damaged chip.
2. Ensure you're working on a static-free mat and have ground yourself to avoid static discharge that could damage more ICs.
3. If the existing chip is not already removed, apply flux to the pins and use the Phonefix soldering wick to remove excess solder.

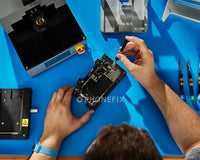
Step 2: Removing the Old IC
1. Using the AiXun H312 hot air gun, gently warm the area around the chip to soften the solder.
2. With the chip now loose, use the tweezers to carefully lift one side of the chip and, using a gentle rocking motion, work your way across to free the entire chip.

Step 3: Preparing for the New IC
1. Clean the pins on the ECU where the new chip will be soldered using a specialized solvent.
2. Apply a thin layer of RMA-218 solder paste to the pins, ensuring even coverage to facilitate an easy connection with the new chip.

Step 4: Soldering the New IC
1. Place the new IC in the prepared position, ensuring that it is aligned correctly.
2. Use the AE680 portable soldering iron to reflow the solder onto the pins, creating a secure bond between the chip and the ECU.
3. Wait for the solder to cool, and then clean the area with solvent to remove any excess flux.

Upon reassembling the ECU, it's vital to conduct thorough testing to verify that the repair was successful. Use FD10 OBD2 diagnostic tools to check for new error codes or discrepancies in the recorded performance data, and start the vehicle and observe for any abnormal behavior. Perform a test drive to ensure that all systems are functioning as they should.

However, ECU maintenance requires certain knowledge and experience. Please perform maintenance under the guidance of professional technicians to avoid potential safety hazards.