Modern vehicles rely heavily on the Engine Control Unit. The ECU integrates a series of chips that manages fuel injection, ignition timing, emissions and dozens of critical engine functions. Although ECU ICs are tiny, choosing the right one is crucial. If IC fails, your car may fail to start, trigger the malfunction indicator light, run unsteadily, or lose power completely.
ECU damage usually comes from common triggers: voltage spikes, water intrusion, short circuits or heat stress. These issues rarely break the entire board at once. In most cases, only one or a few semiconductor chips burn out.
Automotive chips are not universal. The ideal replacement chip must match the original part number, electrical ratings, temperature grade and package form.
Choosing the wrong chip brings serious consequences: 1. Immediate repair failure: Mismatched specs mean the chip cannot handle the ECU’s operating parameters. The ECU will still not boot after soldering.
2. Secondary circuit damage: Incompatible chips may overload surrounding circuits, destroying more components on the ECU board and raising repair costs.
3. Hidden safety risks: A poorly matched chip can mess up fuel and ignition control, causing misfires, overheating or sudden power loss while driving.
4. Shorter service life: Low-grade replacement chips degrade quickly under automotive thermal stress. The ECU may fail again within months.
Before jumping into chip replacement, technicians should confirm the root cause. Simply swapping a chip without identifying short circuits will burn the new component again, leading to repeated failures.
1. Full visual inspection: Check for burnt traces, corroded connectors or cracked solder joints.
2. Circuit testing: Use multimeters and oscilloscopes to isolate the faulty chip.
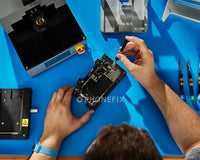
3. Desoldering: Carefully remove the damaged chip without lifting PCB pads. Damaged pads are one of the trickiest issues in ECU board repair.
4. Chip programming: Many Auto ECU chips store vehicle immobilizer data, VIN or calibration maps. The new chip needs correct programming before installation.
5. Soldering and cleanup: Mount the new chip, reflow solder properly and clean flux residue.
6. Bench testing: Power up the ECU on the bench tester to confirm communication and normal operation before reinstalling on the vehicle.
7. Vehicle test drive: Reconnect the ECU, clear fault codes and test under real driving conditions.
ECU chip-level repair targets only the defective component. It cuts costs significantly and retains the original ECU hardware and vehicle calibration when done correctly. However, it requires sophisticated micro-soldering techniques, specialized testing equipment, and a deep understanding of automotive circuit design. Please be sure to choose a qualified repair shop.
The ECU is the central brain of your vehicle, and its chips are the nerve cells. ECU repair can save you hundreds compared to buying a brand-new control unit, but success hinges entirely on picking the right automotive chip. A professional, carefully executed chip replacement restores ECU function safely and reliably, getting your car back on the road without unnecessary expense.
Why the Right Automotive Chip Makes All the Difference